share...
Mouse control
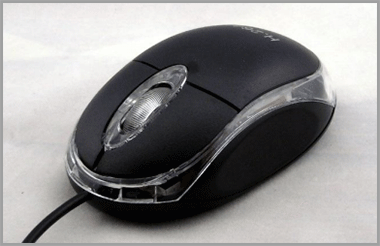
The included USB mouse makes using the DVR PRO simple and efficient. Using the mouse will make controlling the DVR very similar to using a computer. It will allow you to easily click on items to select them and make desired changes.
1.Left-button:
In live view, while in a split-screen display mode, double-click an individual channel to view it in full-screen. Double-click again to return to the split-screen display mode.While navigating menus, click to open a menu option.
2.Right-button:
Right-button:During live view, right-click anywhere on the screen to open the Quick Menu.Within system menus, right-click to exit menus.
3.Scroll wheel: In live view, use the scroll wheel to switch individual channel in full-screen
Unlock navigating menus
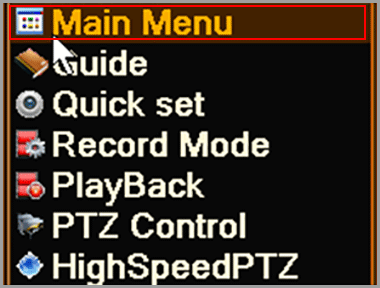
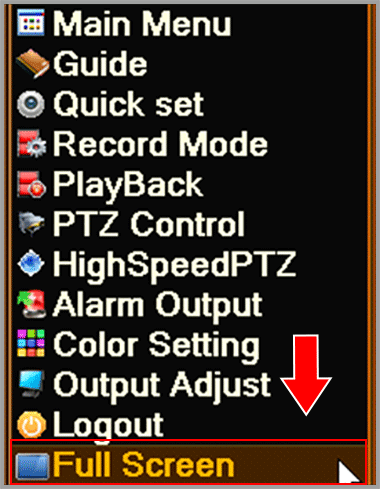
1.During live view, right-click anywhere on the screen, a quick menu pop up, select the Main Menu.
2.Move the mouse grid next to password, click it, a digital pad will appear.
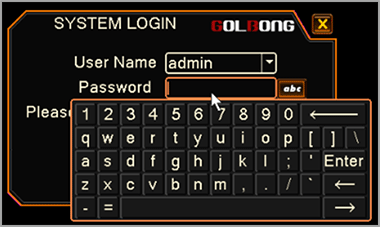
NOTE: click “abc” icon will change the case.
3.Key in the password. The default password is blank (no need).
4.Once you have typed in the password, press the “Enter” key to close the digital number pad.
5.Click “OK” to enter the main menu.
NVR/DVR Network Setting
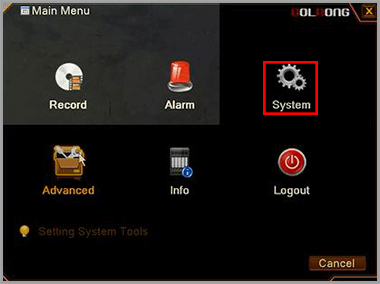
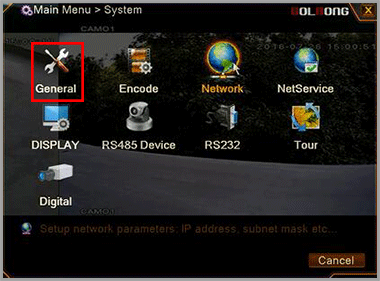
1.Enter the main menu, click “System”, enter sub-menu.
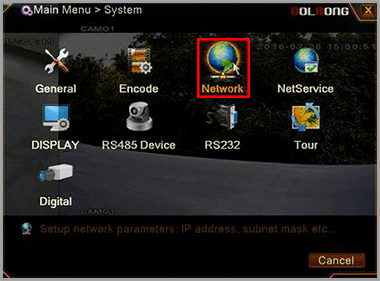
2.Click Network icon.
3.Fill in the IP address, or Mark the checkbox in front of “DHCP enable”. Return to main menu, click Logout to reboot the NVR
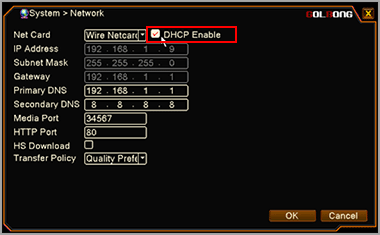
IMPORTANT: Require NVR reboot to receive the correct network setting from your local network
4.Uncheck the DHCP enable to fix the IP address for the recorder.
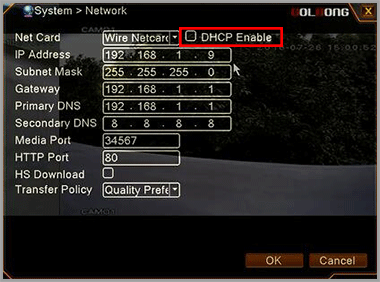
IMPORTANT: Without setting DNS correctly, the email notification and cloud connection could be not working properly.
DHCP operation could make sure the recorder can receive the correct IP setting from your local network.
Setting the time
1.Enter the main menu, click “System”, enter sub-menu.
2.Click “General” icon
3.Select the correct time zone, fill in the “system time”, click OK to save.
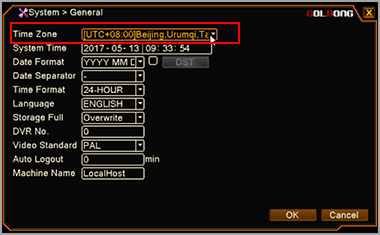
Important: The footage search may not working correct without correct system time.
NOTE: The password recover require system time to generate the code.
Get the live
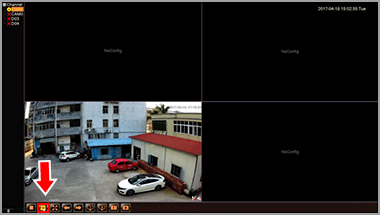
1.Single channel: Click the icon or double-click the channel name in the list.
2.4-channle: Click the icon at the bottom of the screen.
You can long-press the camera and drag the camera to one of the four channel position.
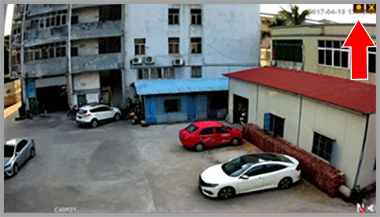
3.Full Screen: Right-click and select “Full Screen”.
4.Leave Full Screen: Under full screen mode, double-click the screen or right-click and select “Leave Full Screen”.
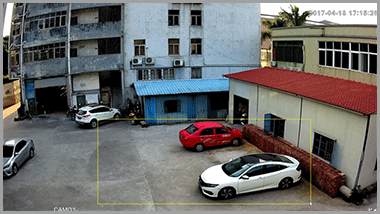
5.Digital Zoom: Left-click your mouse and draw a yellow square to the targeted area. Move your mouse to the targeted area and a magnifier icon appears
Click the area. The picture is enlarged. Double-click to get back to
the original screen
Set camera video quality
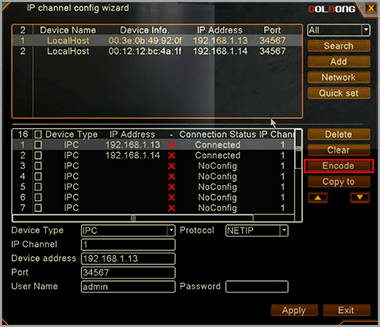
1.Click the icon at the main screen.
2.Click the camera and it becomes highlighted.
Click “Encode” button on the right side.
3.Configure sub stream in the left column and extra stream in the right.
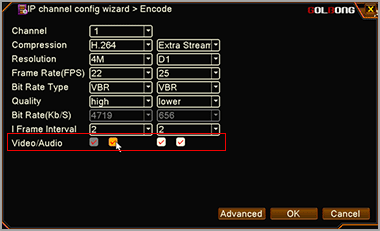
NOTE: Resolution - Main stream-preview HD/SD , and it affects the viewing quality of the video. Sub stream is more suitable for remote viewing, it can save bandwidth.
NOTE: Frame Rate - Frame per seconds. User can select the value of the frame rate, the bigger the value, the better the video fluency.
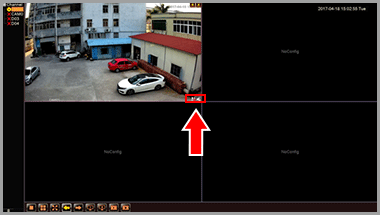
Optional: How to activate the audio in your NVR
1.Mark the right checkbox at the bottom of the columns.
NOTE: Your camera must support audio and connects to audio pick up.
NOTE: The recorder should connect to speaker or amplify.
2.Get back to the monitor screen. The speaker icon means silent mode. Click to activate it .
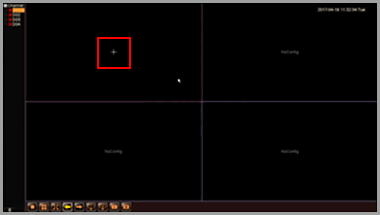
Connect an ONVIF IP camera
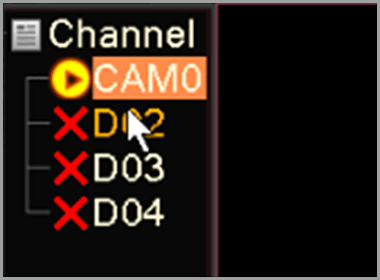
1.Move the mouse to the one channel. The icon “+” appear in the middle of the channel.
2.Click the “+” icon to search online devices. Double-click the camera in the list. It becomes highlighted and appears on the below list.
Select the Onvif from the “Protocol” list.
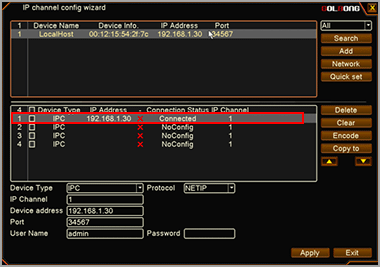
IMPORTANT: Insert the username and password at the bottom of the dialog box if it requires.
NOTE: You can click the Red cross icon to delete the added cameras.
3.Click “Apply” to Save.