Install the hard drive to the recorder
The record require hard drive installed to record the footage. The first time reboot after hard drive is installed, The recorder will pop up the message, click ”OK” to format the hard drive. Also we can login the main menu and format the hard drive manually.
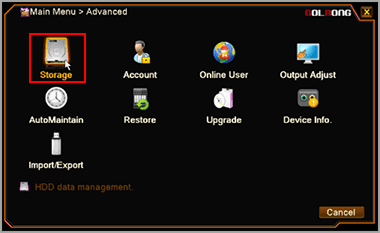
1.Enter the “Main Menu”, click icon Advanced, enter Storage
2.Select the hard drive from the list, Click “Format storage”, click OK to format the hard drive.
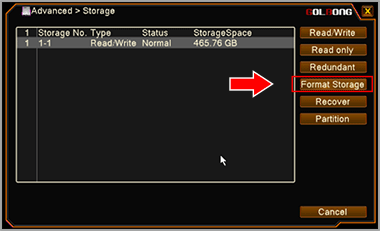
IMPORTANT: All the data will be erased after hard drive is formatted.
NOTE: Storage information is available only after hard drive is installed successfully
Configure the recording
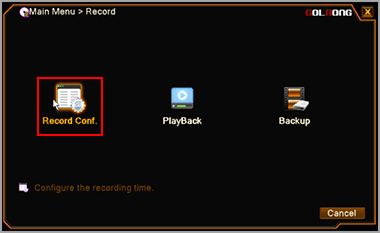
1.Enter the “Main menu”, Click icon Record, Enter “Record Confi.”
2.Check the “Regular”, “Detect”, “Alarm”
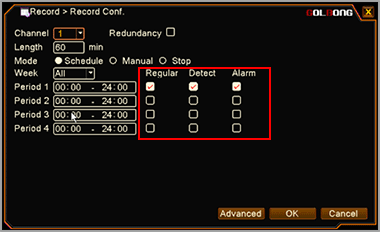
NOTE: uncheck “Regular” will only record the video with motion and alarm
NOTE: You can customized the recording schedule or use the default setting
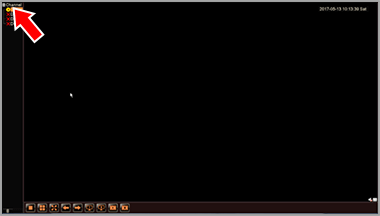
NOTE: You can see the tape icon on each channel once the recording is activated
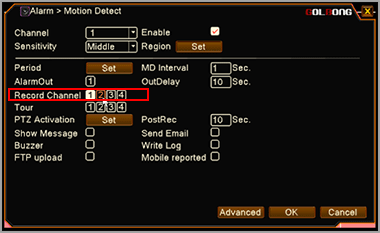
Enable the motion recording
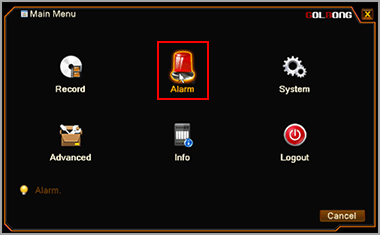
1.Enter the “Main menu”, Click “Alarm”
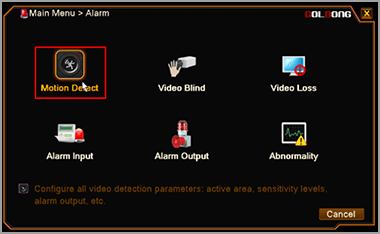
2.Click “Motion Detect”
3.Check “Enable” to turn on motion detection. Select the Channel to configure the motion recording
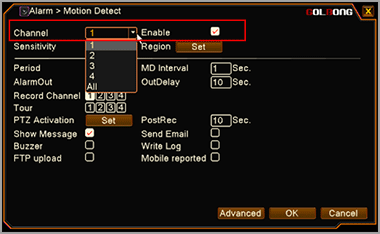
NOTE: Choose “All” will apply the setting to all the cameras
4.Click “Set” next to Region to select the area for motion detection.
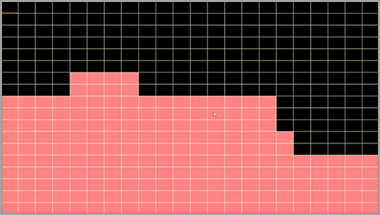
NOTE: The red block is the selected area for motion detection
NOTE: Specify the area for motion detection can reduce the false alarm.
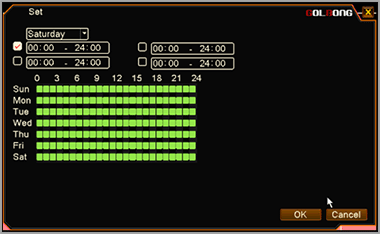
5.Click “Set” next to Period can customize the schedule to active the motion detection.
6.Pick a lead time for “MD interval”
NOTE: If the camera generates too much motion on the scene, pick a longer lead can ignore some motion.
7.Select the “Record Channel”.

NOTE: on one channel pick up alarm can initial the recording on the rest of other channels.
8.Set how long keep recording after the motion is detected on “PostRec”
NOTE: only the IPC with on-board storage can have pre-recording function.
9.Click OK to save
NOTE: the Onvif cameras require motion detection setting on the IP camera.
Optional: Enable external alarm recording
Only there are external alarm devices such as door contact, PIR sensor connecting to the ip camera can trigger alarm recording.
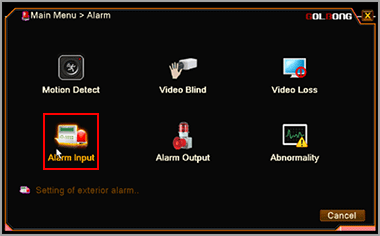
1.Enter the “Main menu”, Click Alarm, enter “Alarm input”
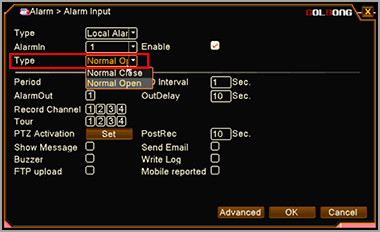
2.Check “Enable” to turn on external alarm input.
3.Select the Channel to configure the alarm recording
4.Select IPC alarm from the “Type”, Select alarm type from normal close and normal open.
5.Click “Set” next to Period can customize the schedule to active the alarm input.
6.Pick a lead time for “MD interval”.
7.Select the “Record Channel”
NOTE: alarm pick-up one channel can initial the recording on other channels.
8.Set how long keep recording after the motion is detected on “PostRec”
NOTE: only the IPC with on-board storage can have pre-recording function.
9.Click OK to save

