In this section, we will show you how to access your IP camera or NVR remotely with windows PC. It supports windows 7 or above. CMS5 is the free VMS software which supports ONVIF. You may try to connect to the 3rd party ONVIF-supported IP camera.
Installing Software
Download the latest version of the windows PC software using the link below.
Connect to IP Camera
1.Click icon CMS5, a dialog will appear. Key in the username and password to enter Main console.
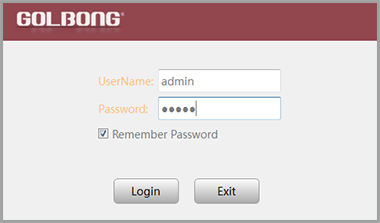
NOTE: The default username and password of the software is “admin”
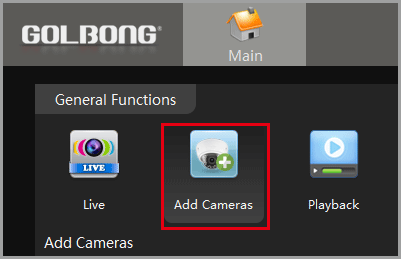
2.In the "Main" , Click “Add Cameras” to enter a new screen.
3.Click “IPV4 search” button. The available devices will display on the left screen.
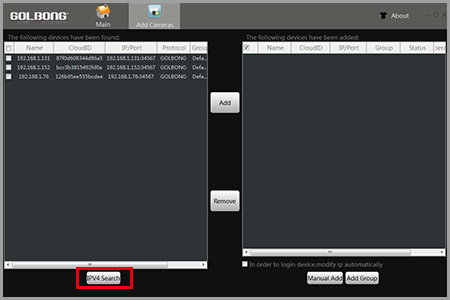
4.Mark the checkbox in front of the IP address, click “Add ” button. The IP camera will move to right.
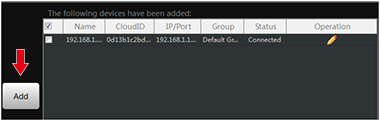
5.Click the pen icon under “operation”, a new dialog pop up, name the camera, Click “OK” to save.
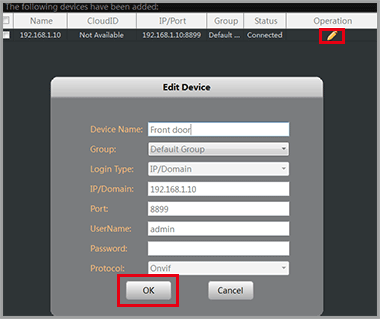
NOTE: NO password required for camera/NVR in default. You can jump to page-11 to change camera’s password.
NOTE: If you want to access the camera out side of LAN choose cloudID in “Login Type”
6.Once the software has connected the camera successfully, the “Status” will change to “connected”

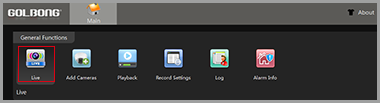
Watch the live
1.In the "Main" , Click "Live" icon to enter live view interface.
2.Double click the camera in the devices list. CMS5 will start receiving the live.
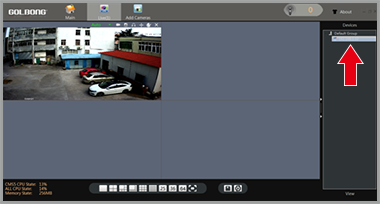
NOTE: Double click the name again can close the video.

